


Installation
Tile installation is an art and science that requires precision, skill, and attention to detail. Whether you're refreshing a kitchen backsplash, upgrading bathroom walls, or installing a new floor, the process involves several steps to ensure a flawless and long-lasting result.
Preparation
Preparation is the cornerstone of successful tile installation. Begin by ensuring the surface is clean, level, and dry. Remove old flooring or wall coverings and patch any cracks or holes. For floors, a concrete subfloor or backer board is often required to provide stability and prevent shifting. Measuring the space and planning the layout ensures that tiles are placed symmetrically and fit well within the area.
Tools and Materials
- Gather the necessary tools and materials, including:
- Tiles
- Adhesive or thin-set mortar
- Tile spacers
- Grout
- Trowels
- Tile cutter or wet saw
- Level
- Rubber float
- Sponge
- Safety gear (gloves, goggles)
Installation Process
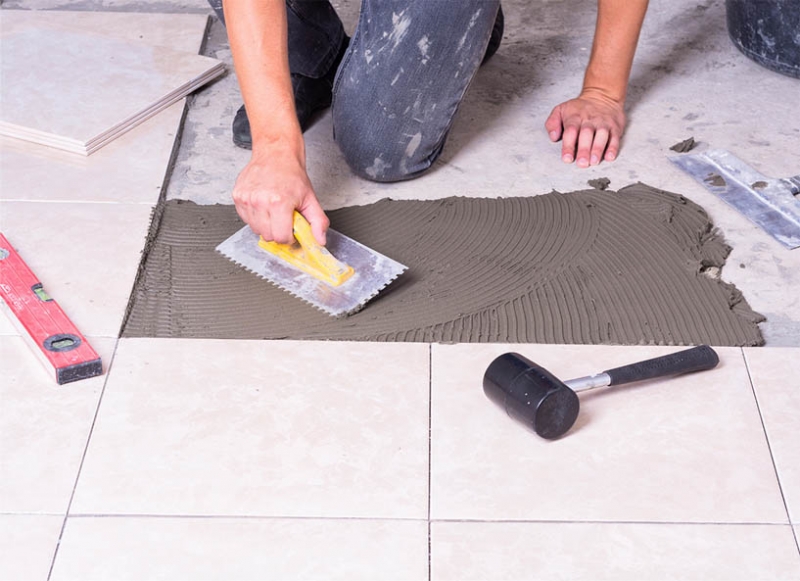
- Laying the Adhesive: Spread a thin layer of adhesive or mortar using a notched trowel. Work in small sections to prevent the adhesive from drying before tiles are placed.
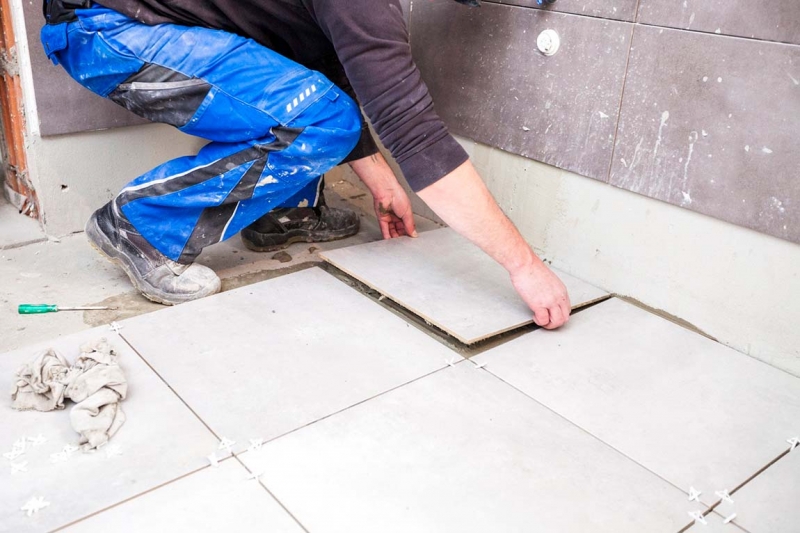
- Placing the Tiles: Start from the center of the space and work outward to ensure even placement. Use tile spacers to maintain consistent gaps between tiles.
- Cutting Tiles: For edges and corners, measure and cut tiles using a tile cutter or wet saw to achieve precise shapes and sizes.
- Checking Alignment: Use a level to ensure tiles are even and aligned. Adjust as needed before the adhesive sets.
- Applying Grout: Once the adhesive has cured, remove the tile spacers and apply grout using a rubber float. Spread the grout diagonally across the tiles to fill gaps, then wipe away excess with a damp sponge.
- Final Cleanup: After the grout has dried, clean the tiles with a dry cloth to remove any haze or residue.
Curing and Sealing
Allow the grout and adhesive to cure according to the manufacturer's instructions. For natural stone tiles, apply a sealant to protect the surface from stains and moisture.
Benefits of Professional Installation
While DIY installation is an option, hiring professionals ensures a polished result. Experts bring experience, tools, and knowledge to handle challenges such as uneven surfaces or intricate patterns.
Final Thoughts
Proper tile installation enhances the appearance and functionality of your space. By following the correct steps and using quality materials, you can achieve a stunning, durable finish that adds value and style to your home.
Frequently Asked Questions (FAQ) Tile Install?
Yes, sealing grout helps prevent stains and moisture damage.
Wait at least 24 hours before walking on tiles and 72 hours for heavy furniture placement.
Yes, but only if the existing surface is stable, level, and free of damage.
Most adhesives cure within 24-48 hours, but always follow the manufacturer’s guidelines.
Grout line size depends on the tile type and preference but typically ranges from 1/16” to 1/8”.
Use a thin-set mortar for most tile installations, but check the manufacturer’s recommendations.
Natural stone tiles often require sealing before and after installation, while ceramic and porcelain do not.
Use a level and tile leveling system to keep tiles even during installation.